The Bliss OS x86 is another Android-based operating system. You can say it is a fork of Android x86 project which open source and free t...
The Bliss OS x86 is another Android-based operating system. You can say it is a fork of Android x86 project which open source and free to use. The custom Android Bliss OS is not 0nly available for X86 PC or laptops but also the other x86 based devices can be used for its installation including smartphone and Tablets. If you are familiar with the process- how to flash a smartphone then now you know the Bliss OS is here. It supports both 32 bit and 64 bit of devices.
The builds of Bliss OS also compatible with Chromebooks and MacBooks running on Intel or AMD CPU. For gaming, the Octopus has included as keymapping solution developed by Phoenix OS team (another Android OS).
In this tutorial, we let you how to install Bliss OS X86_X64 on PC as well as VirtualBox.
Bliss OS Minumum System hardware requirements
- X86 processor
- 1 Gb HArd disk
- Minimum 512 RAM and 2 Gb is recommended
Download Bliss ISO Image
- To install this Android OS on PC, first of all, we will download the Bliss OS x86_x64 bootable ISO file.
- Go to blissroms.org download section
- When you visit the Bliss OS download repository you will find different folders such as Bleeding_edge, Nightly, Stable, and Udoo.
- Select and Open the Bleeding Edge folder.
- You will find multiple releases of the Bliss OS – both stable and beta.
- Download the latest stable ISO file version of the OS. Android 10 is available on it.
- For example, in our case, it was: Bliss-v11.4-Stable–OFFICIAL-20181228-0938_x86_64_k-k4.20-gal_m-18.3.1_pie-x86_f-dev-kernel.org.iso
- After downloading the Bliss ISO file, go to the next section of creating a bootable pen drive.
Create Bliss x86_X64 bootable USB drive
- Once the ISO file of Bliss OS downloaded on your machine its time to create a bootable USB drive.
- For that, first, download the Rufus Bootable USB software. Here is the link.
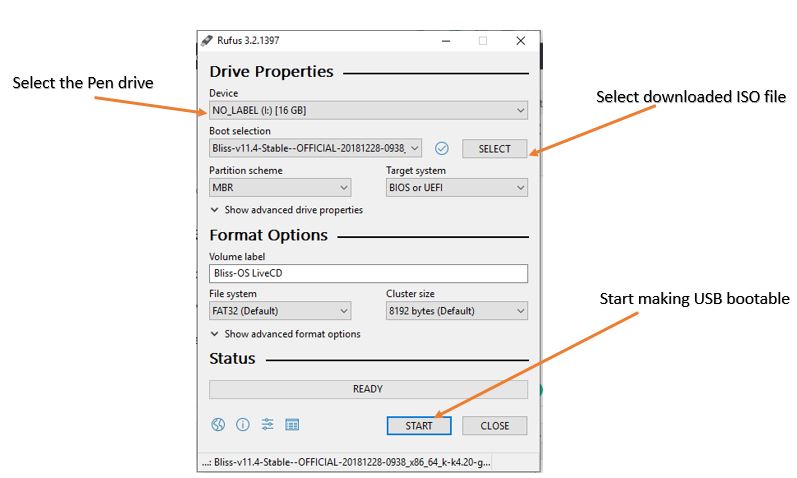
- Insert the Pen drive to a system in which you want to make bootable.
- Click on the Rufus setup and run it. This bootable USB maker is a portable software and doesn’t need installation.
- When it opens, select the Pen drive from the Device section.
- Then click on the SELECT button and select the above downloaded Bliss ISO image.
- Finally, click on the START button, and the process of making Bliss OS bootable pern drive will start.
- You get a pop-up, ignore it, and press the OK button.
- It will again warn you that all data on the Pen drive will erase, so make sure nothing is important on the USB drive. Then click on the OK button.
Install Bliss OS on PC and VirtualBox Virtual Machine
Oracle VM VirtualBox
Oracle VM VirtualBox, the world’s most popular open source, cross-platform, virtualization software, enables developers to deliver code faster by running multiple operating systems on a single device. IT teams and solution providers use VirtualBox to reduce operational costs and shorten the time needed to securely deploy applications on-premises and to the cloud.
Download Virtual Box 6.1
After creating the Bootable pen drive. Insert it into the PC system where you want to install the Bliss OS.
Step 1: Boot your system with Bliss OS USB drive
If your system’s first boot order is already set to Removable media then the OS will automatically boot. Otherwise first set the boot order. OR use any of this F2, F8, F12, or Esc according to your system BIOS to select the booting medium or device.
Step 2: Select- Install Bliss-OS to hard disk
As the first screen of booting appears, select the Installation- Install Bliss-OS to hard disk option.

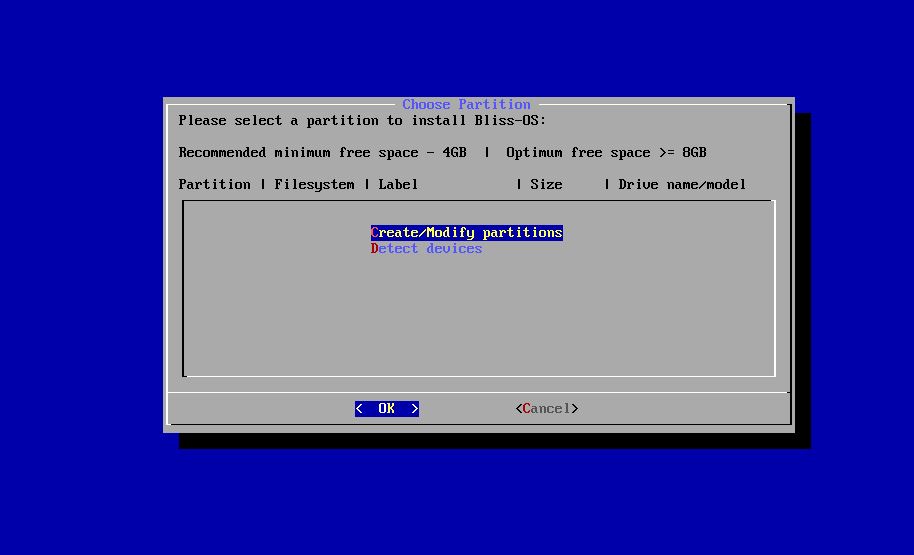
Step 4: Create/Modify partitions
Use the Tab key and then arrow keys to select the Create/Modify partitions and click 0n the OK button.
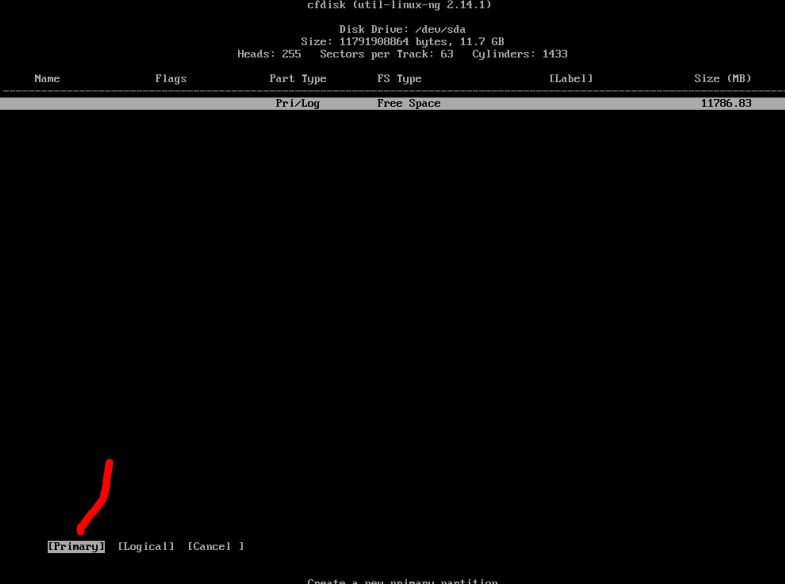
Step 5: Primary Partition
Here you will see the disk drive and its space in MB available in your same for both PC and Virtual machine. Select the Primary option and press the Enter button.
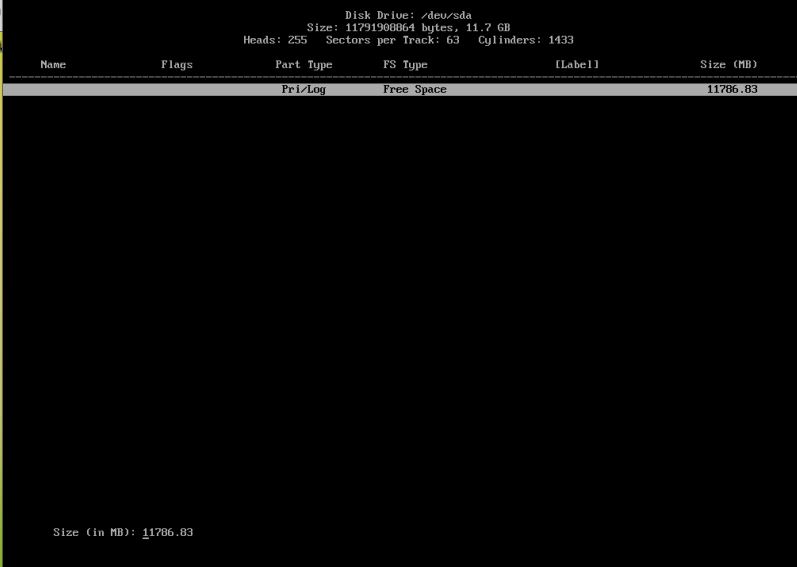
Enter the amount of space you want to allocate to the BlissOS and then press Enter.
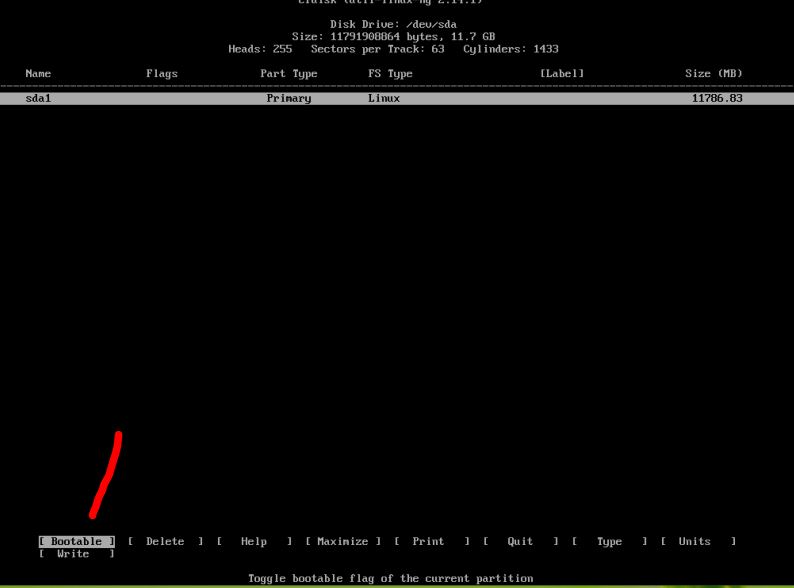
Step 6: Mark primary partition bootable
Now mark the created primary partition a bootable. For that just select the Bootable option and then the Enter button.
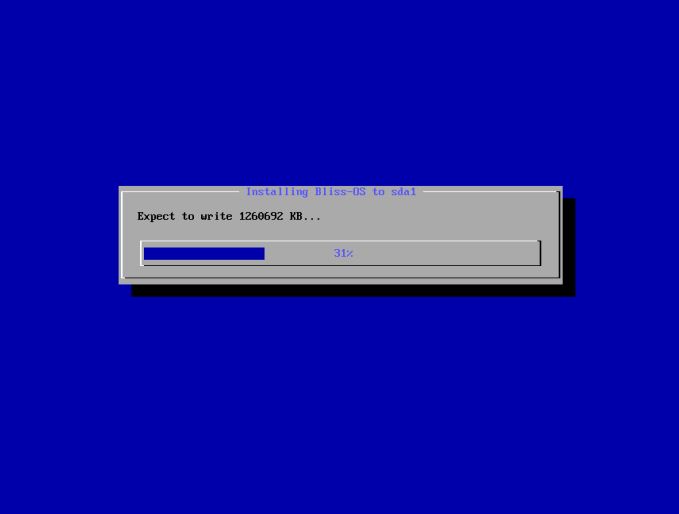
Step 7: Write the changes to prepare a disk for Bliss installation
After the above step, we need to write out alterations to the drive. Select the Write option for that and again press the Return/Enter key.
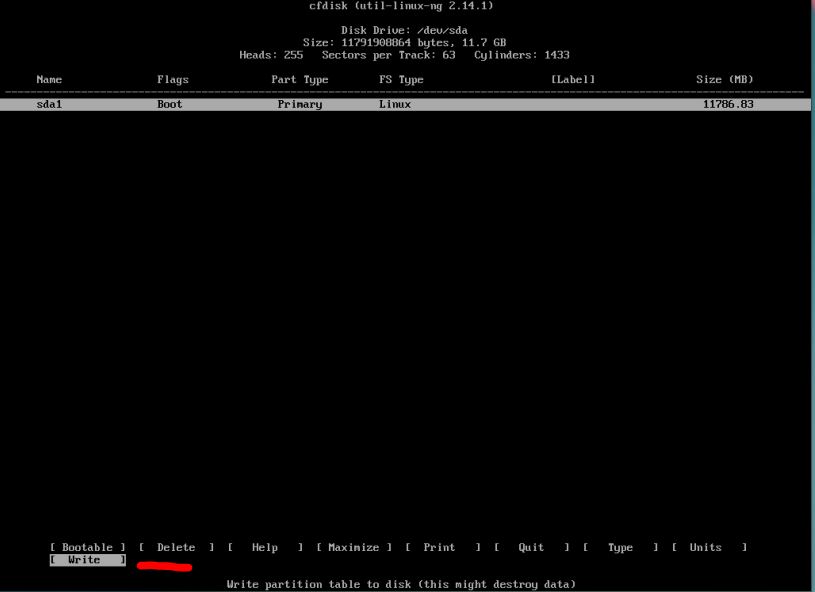
For implementing the changes, it will ask for your permission. Type yes

One the above step process is done, it’s time to quite the partition table creation tool. Use the Quit option.

Step 8: Install the Bliss OS
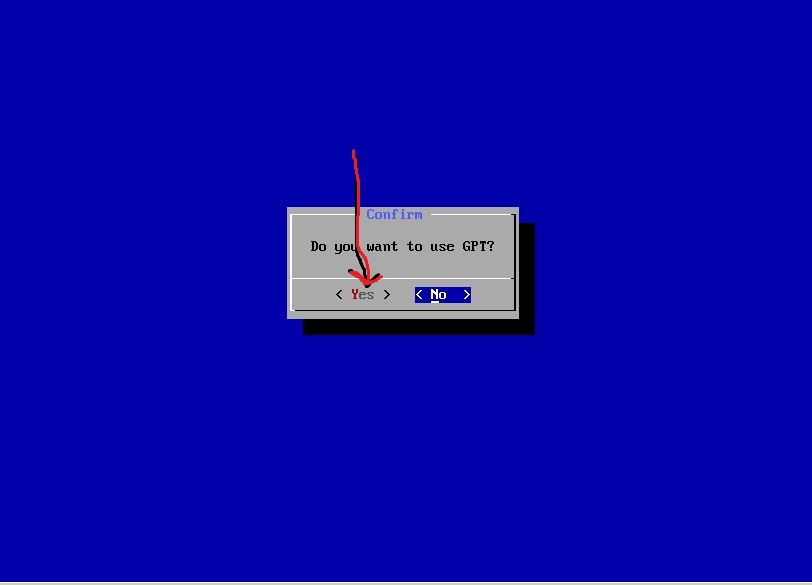
As soon as you quit you will again see the Choose Partition section, where this time you will find a partition to install the OS. Select that and press OK button.

It will ask to create a GPT, just select YES.
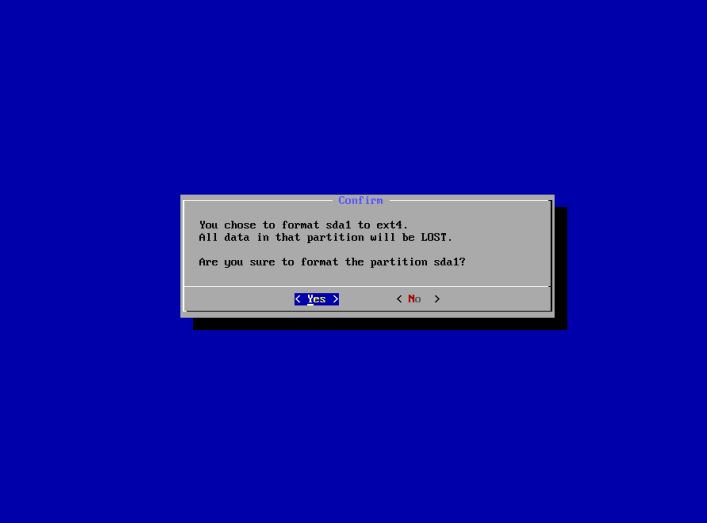
Format the drive using ext4 or any other filesystem format you want.
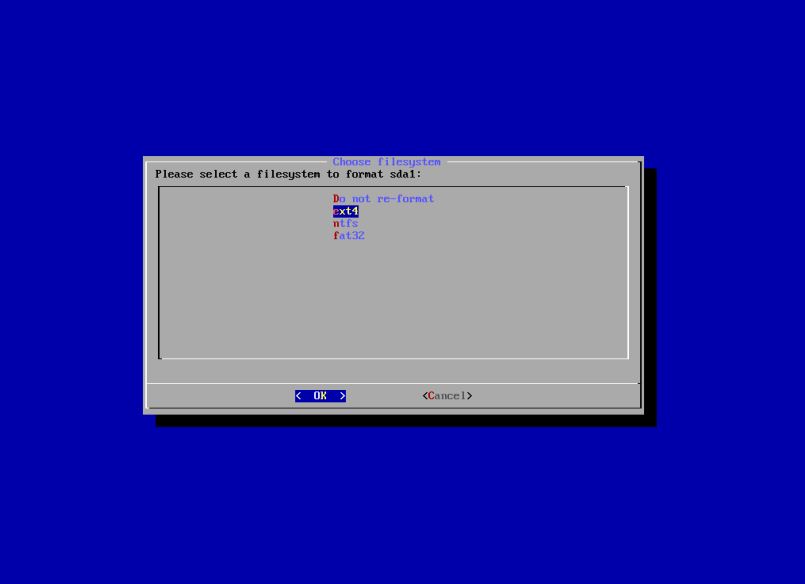
Select the Yes option.
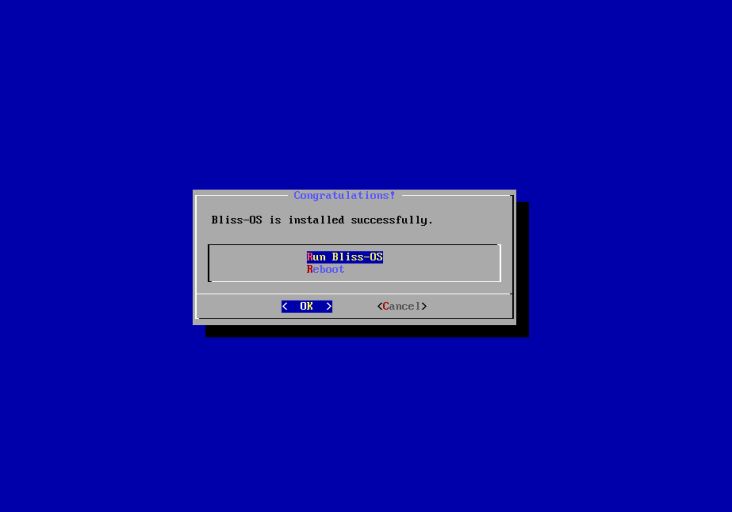
Step 9: Reboot PC or Virtual MAchine
Once done Remove the Pen Drive and Select the Reboot option and you will get the Bliss OS installed on your system.
Blis OS VirtualBox installation
Although the whole process of installation is similar for Virtualbox Virtual machines too, just the beginning will be a little bit different.
Step 1: Open the VirtualBox.
Step 2: Click on the New option given on the menu.
Step 3: Give some name to your virtual machine.
Step 4: Select Type- Other and version Other /Unkown 64-bit.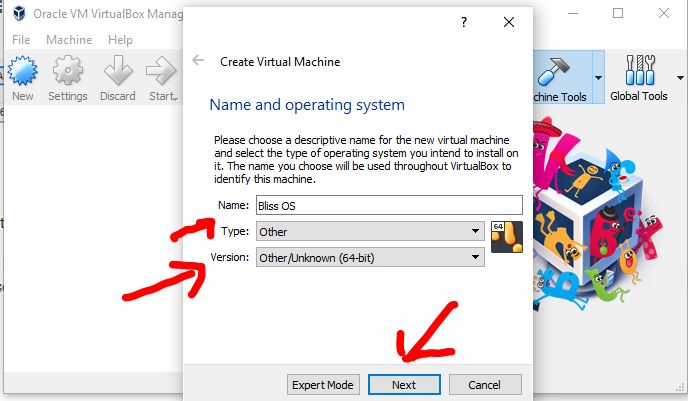
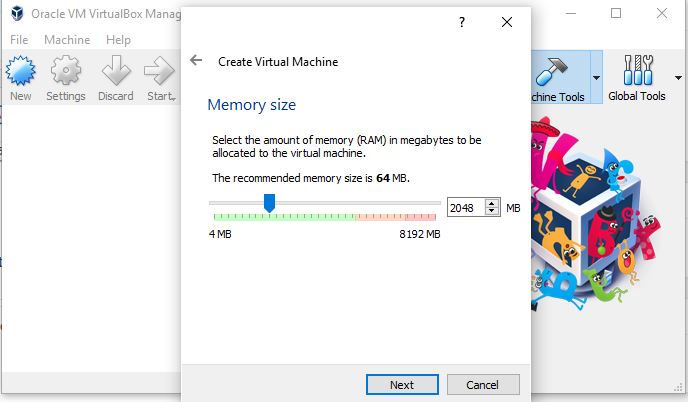
Step 5: Assign the RAM, 2GB would be good but recommend up to 4GB for better performance.
Step 6: Select Create a virtual disk now and click on the Next button.

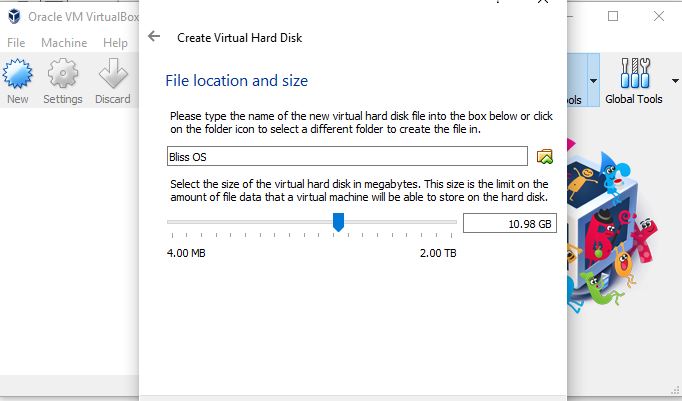
Step 7: Assign around 10GB or more of space, if you want to install apps or games from the Play store.
Step 8: Now Click on the Setting icon from the Menu of the virtual box and select the Storage option and then Empty CD disc icon. After that just click on the CD icon given under the Attributes section and select the Choose Virtual Optical Disk File... to assign the downloaded Bliss ISO file to Virtualbox for its installation.
Step 9: Click on OK button and then Start the Virtual machine. Reset of the procedure will be the same as mentioned for the PC installation.

Step 10: Once the installation has done on the Virtual Machine. The OS asks for reboot, then first remove the inserted ISO disk from Virtualbox by right-clicking on the CD icon given on the right bottom side.
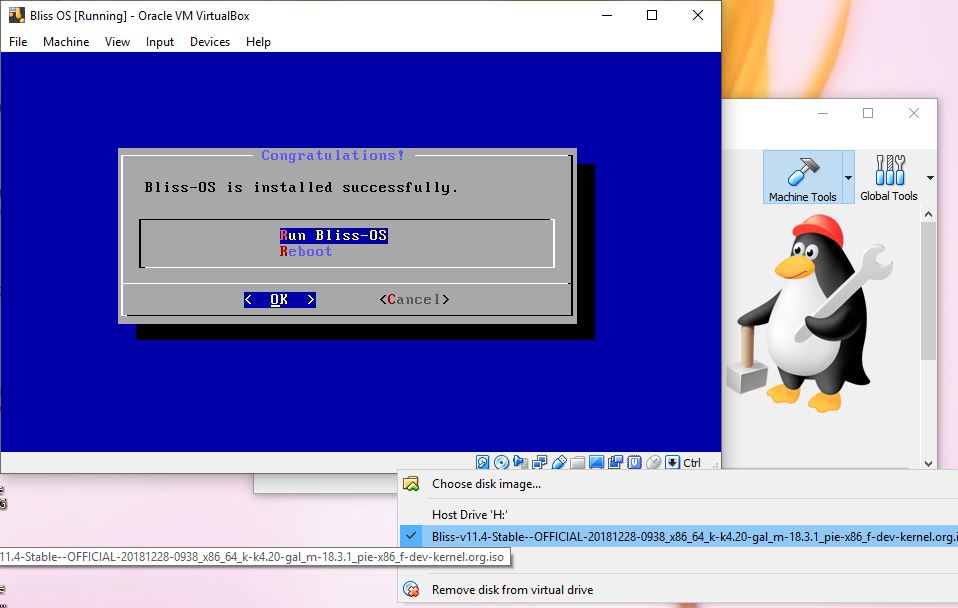
Finally, the OS has installed, now we can play around with.


.png)
No comments